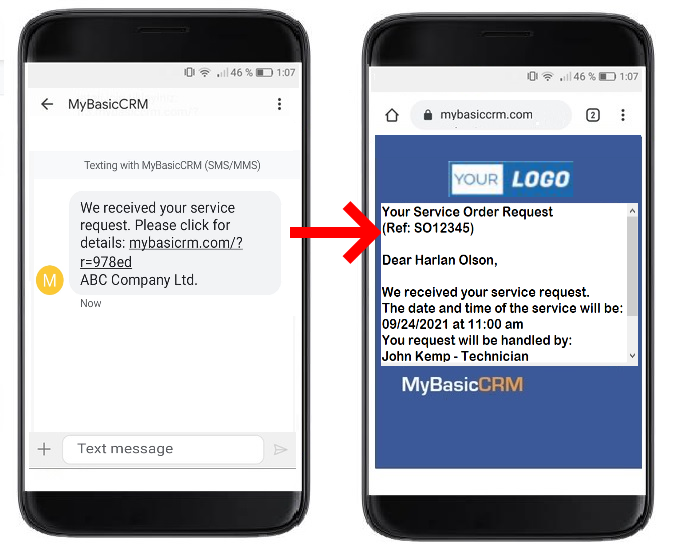
This tutorial explains how to set up MyBasicCRM to send automated emails and SMS messages to your contacts/clients after specific actions defined by you, for example:
- sending details or results of service orders for your customers
- sharing planned visit/meeting dates to your customers
- informing your customers of the status of shipments
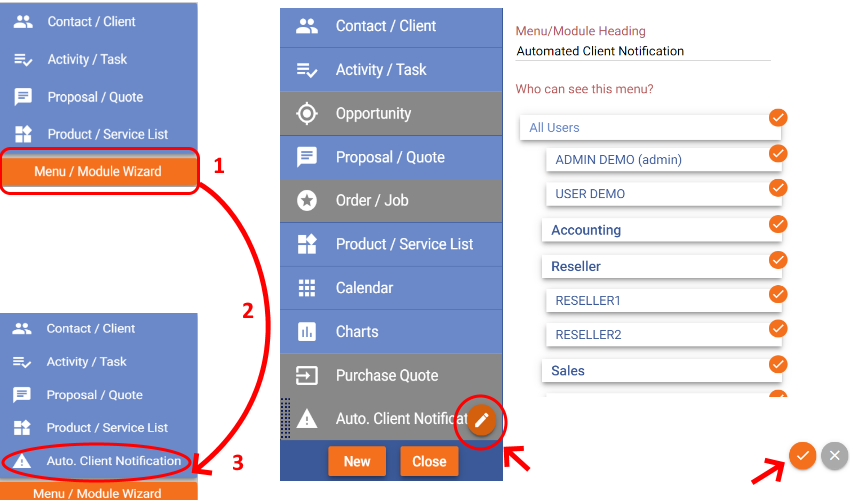
ENABLING AUTOMATED NOTIFICATIONS
Click on the Menu/Module Wizard. Click on the pen shape to enable the 'Auto Client Notification' module. Select the users who can see this module and save it. Close the wizard, and you will see the new item on the menu.
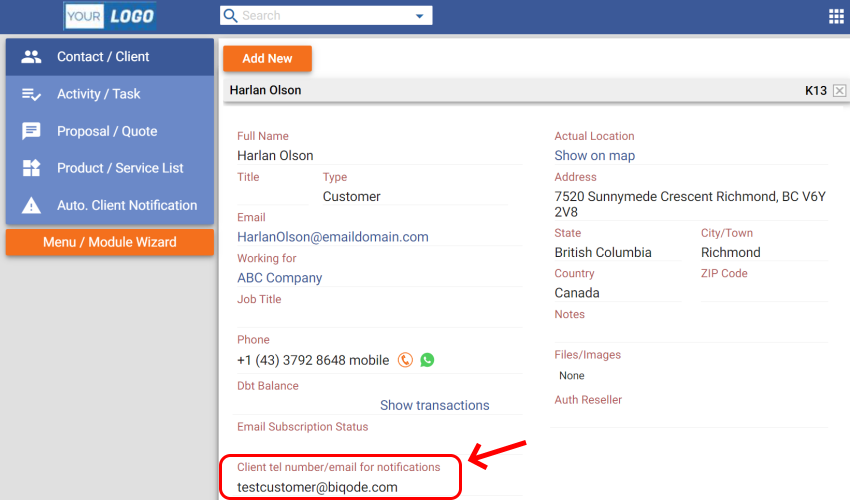
You will see a new text field on your contact's page to put the email address or SMS number you want to send notifications to. Go to any of your contact's pages, add an email address to this field before moving on.
CREATING AN AUTOMATED NOTIFICATION
Let's create a scenario for this tutorial. Suppose that our client has a service request. We want to notify our client about the service's date and time, triggered by the request's assignment to one of our technicians.
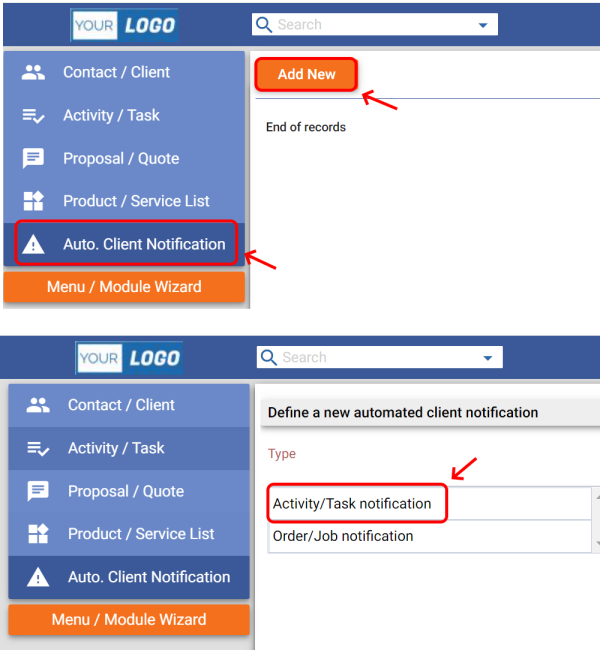
Go to 'Auto Client Notification' and click 'Add New'. Select 'Activity/Task Notification' on the next page.
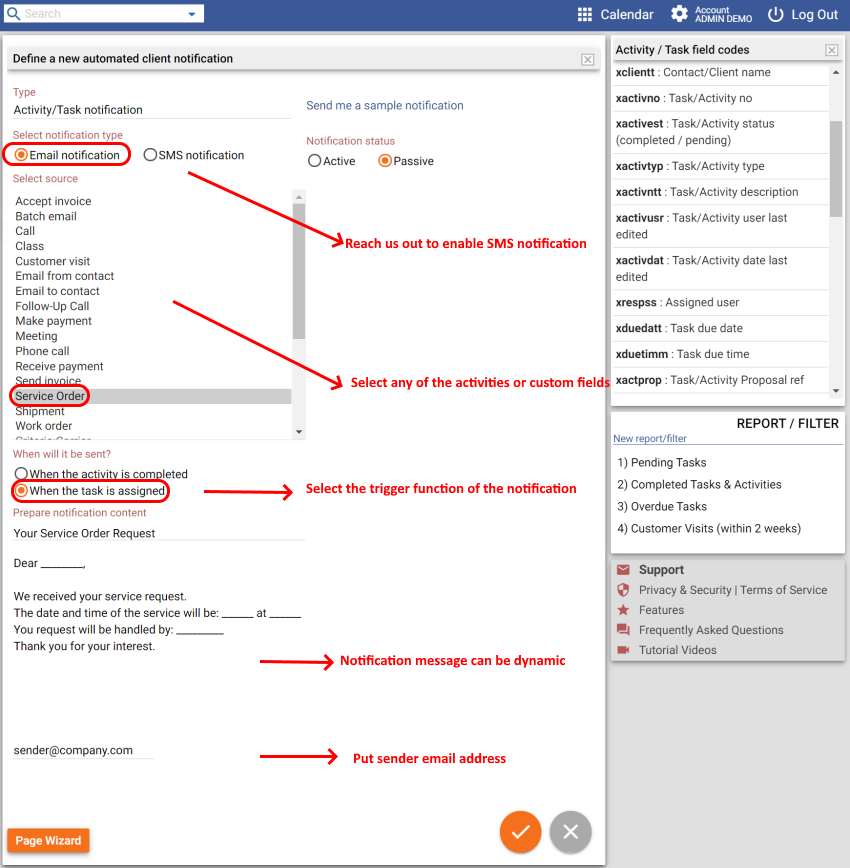
Fill the relevant fields of the form as described below:
Select notification type: Select 'Email notification'. If you want to enable SMS notifications, please reach us at support@mybasiccrm.com and inform us about your SMS service provider.
Select source: You can select any activity or custom field you defined using Page Wizard. If you need help with custom fields, please refer to the related tutorial on using the Page Wizard. For the sake of this tutorial, we are using a custom-created 'Service Order' activity.
When will it be sent?: Choose if you want to notify your client after completing the activity or when you assign the task to one of your users.
Prepare notification content: Put the notification subject and body here. With MyBasicCRM, you can create dynamic content thanks to the 'field codes' defined for this purpose. We will explain this in the following slides.
CREATING DYNAMIC NOTIFICATION CONTENT
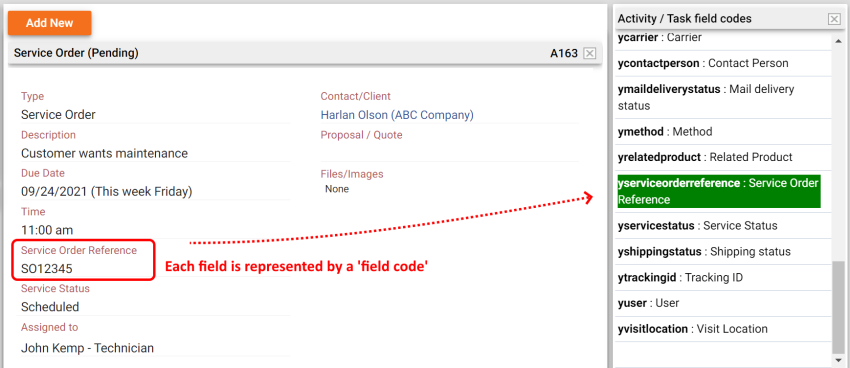
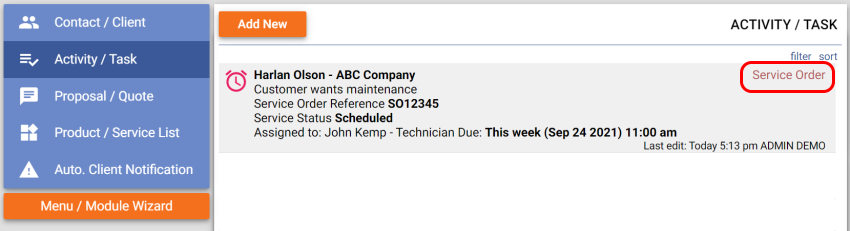
A field code represents each field in MyBasicCRM, either default or custom-created by Page Wizard. In the following example, you can see a pending Service Order activity with a custom text field, i.e. Service Order Reference.
You can choose any dynamic variable from the 'field codes' listed in the right corner of the page. Click on the field code to copy it, and it will turn green when copied, then paste it to your content.
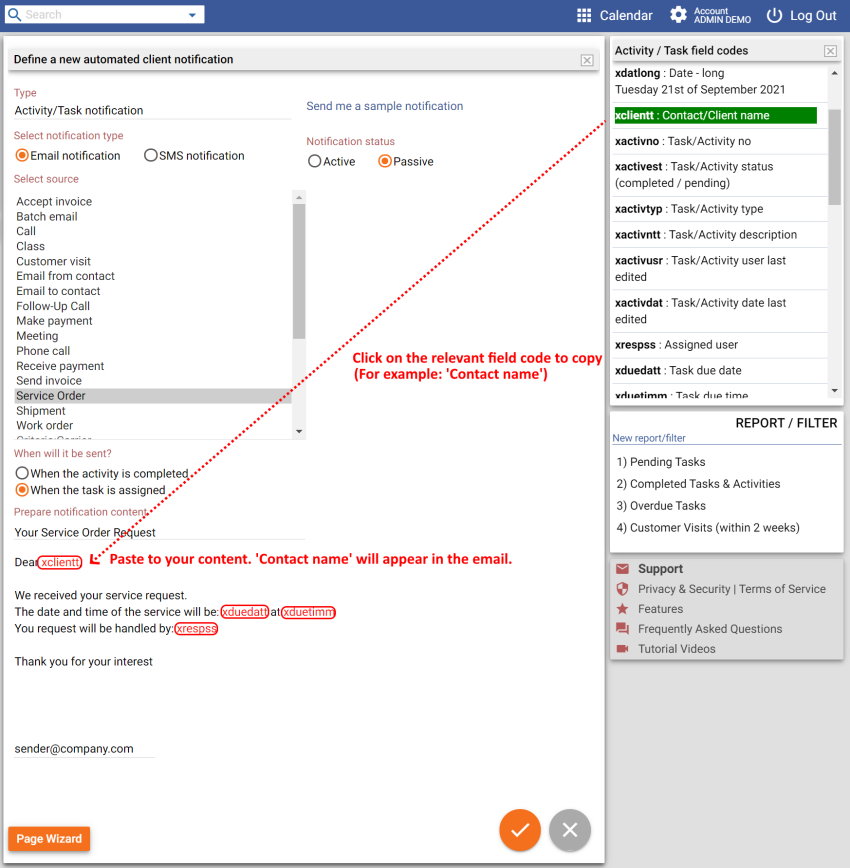
Let's insert a 'field code' for a custom-created field to our subject line.

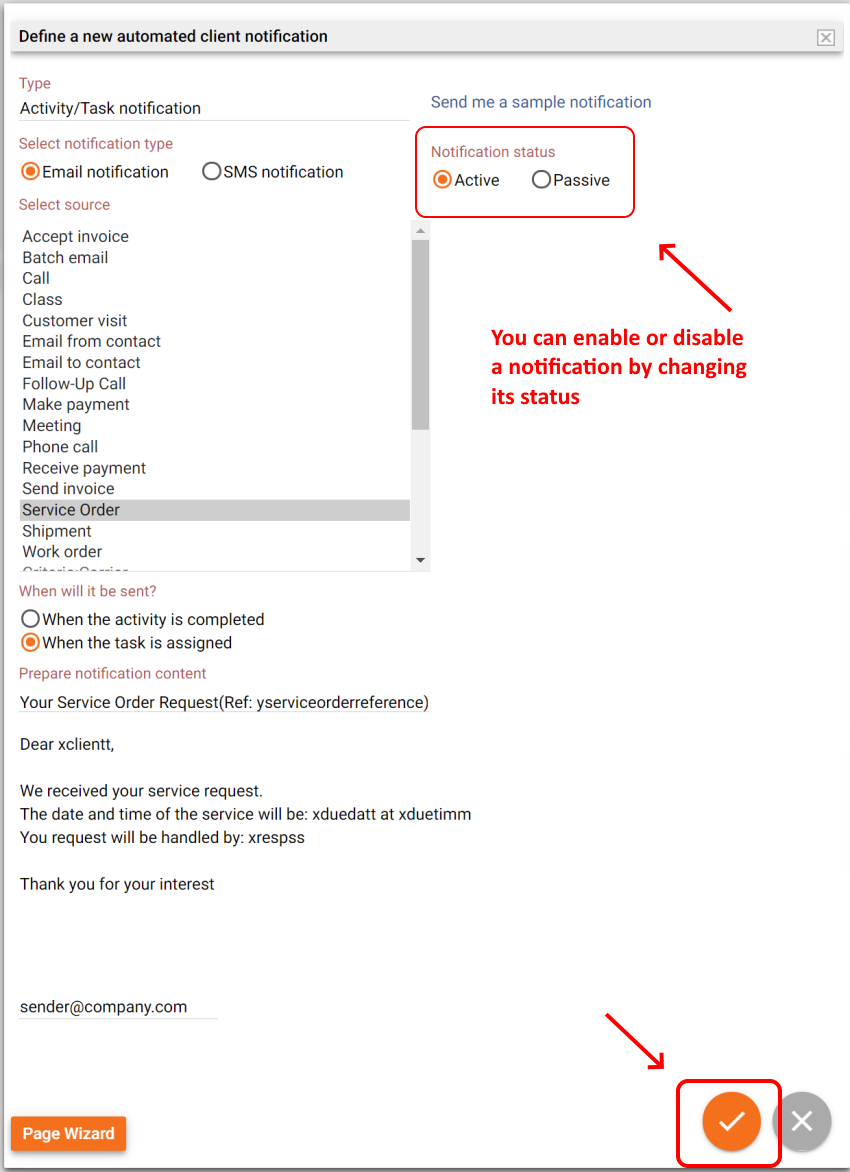
You can 'Activate' the notification and save it. You can also enable or disable the notification anytime you want. We recommend keeping the status 'Passive' until you finish testing it. We will test our automated notification in the following slides.
TESTING AND ACTIVATING AUTOMATED NOTIFICATION
Go to the notification you just created. Click on the 'Auto Client Notification' menu item, and see the list of notifications you have created. Click on the 'Send me a sample notification' link. A new page (or tab) will open for testing purposes. Use this page to continue testing.

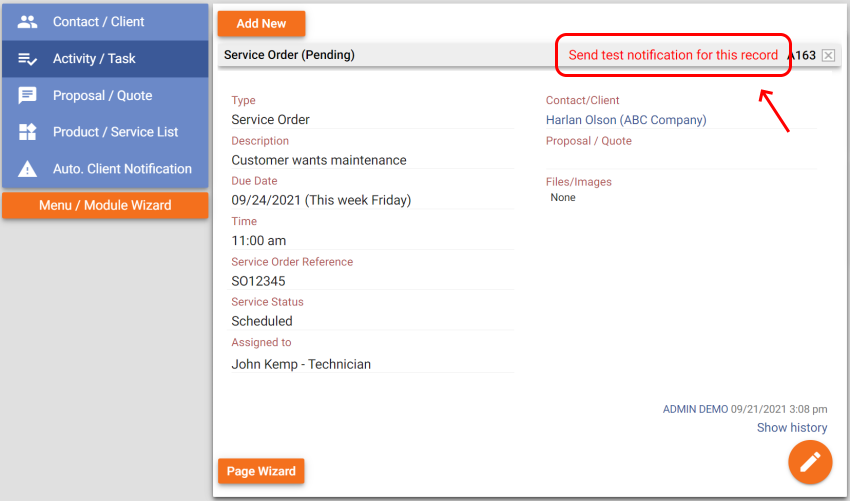
Find and open any related page (activity, order, proposal, etc.) for which you created the notification. For this tutorial, we can select any Service Order activity.
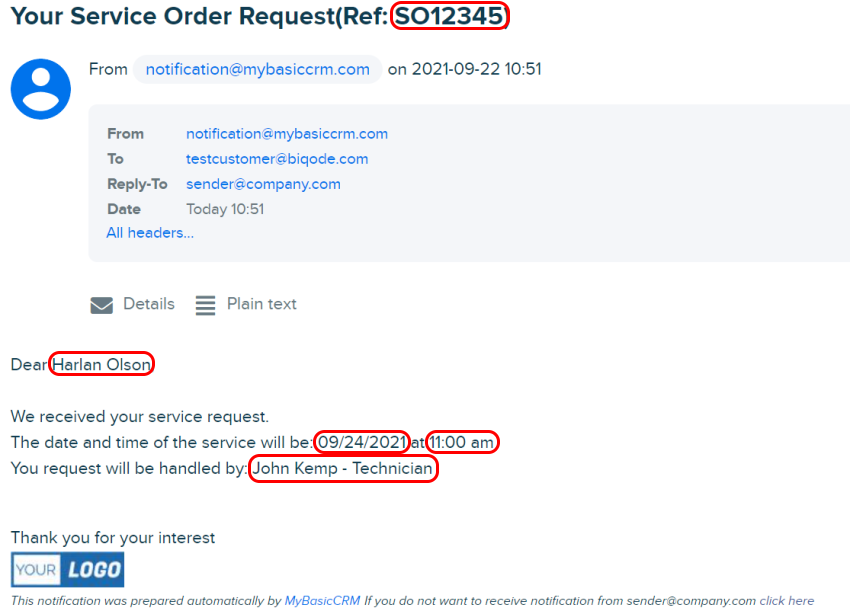
Click on the 'Send test notification for this record' link. MyBasicCRM will send a test notification to your email address (not your client's email address).
Check the notification content carefully, update and test again before 'Activating' the notification.
AUTOMATED SMS NOTIFICATIONS
Please reach us at support@mybasiccrm.com and inform us about your SMS service provider if you want to enable SMS notifications.
After successful configuration, your clients will receive short SMS messages with a link to detailed message content.