You can easily create follow-up tasks, automatic reminders, and business flows with MyBasicCRM
CREATING FOLLOW-UP TASKS
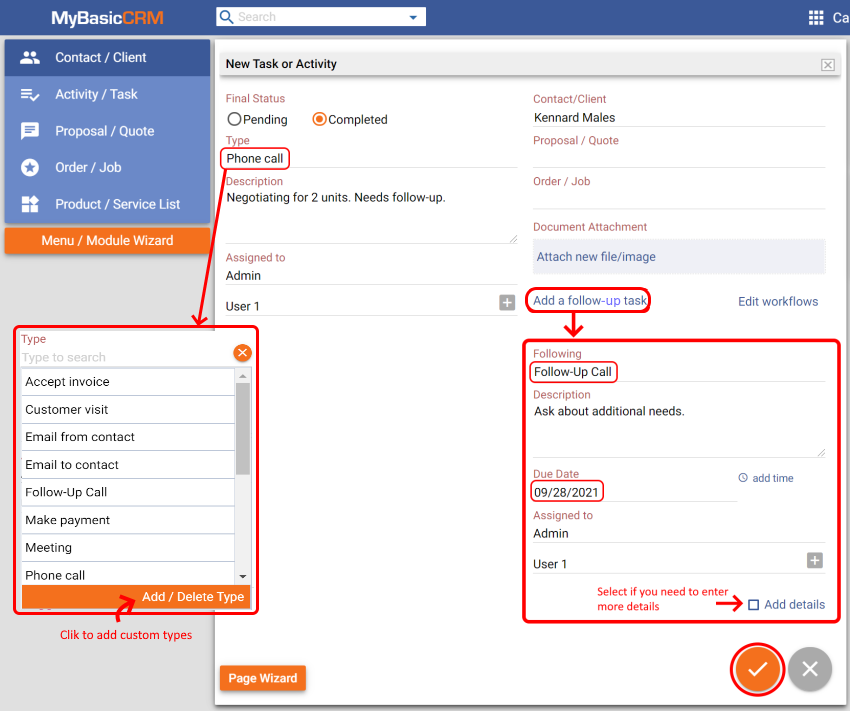
Go to your contact page. One way of doing this is by using the search bar on top of the page. Click the blue circle and then add a new 'Activity/Task' for this contact.

Select an activity, such as a 'Phone call'. You can also add custom activities that are suitable for your business. Click the 'Add/Delete Type' button to edit your activities. You need to click the 'Add a follow-up task' button to add a successor activity. For example, you can add a follow-up call task and define a due date.
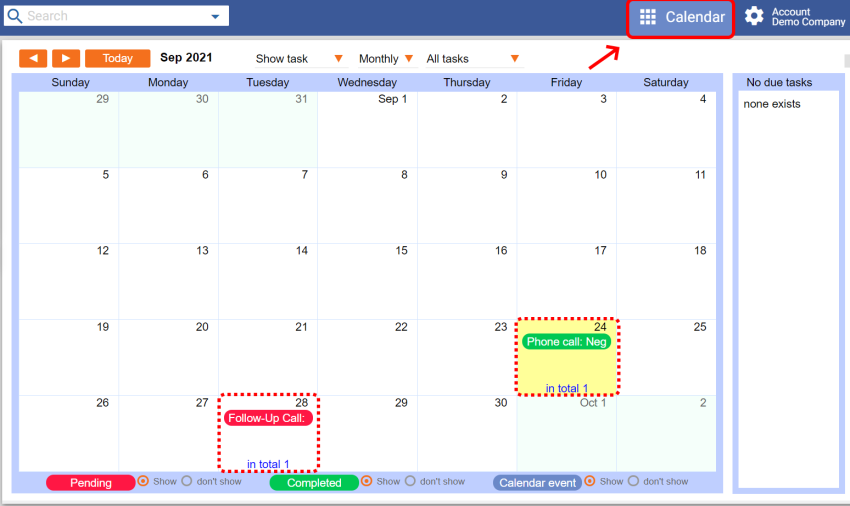
Both activities will appear on your contact page.

You can also go to your calendar to see and edit your activities.
CREATING WORKFLOWS
Let's think of a workflow scenario in which 'User1' from the sales department prepares proposals for clients. User1 sends the proposals automatically to the 'Admin' for approval within 3 days whenever proposal status is saved as to 'Approval'. Admin checks the proposals and sends automated work orders to User1.
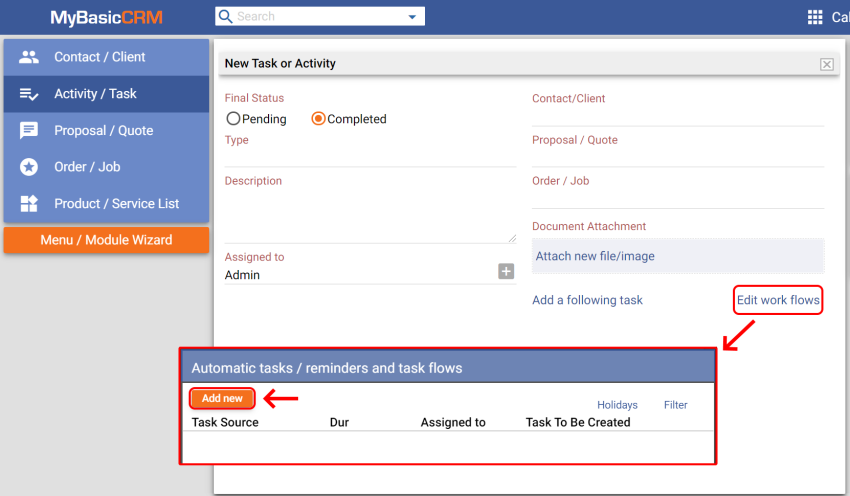
Go to the 'Activity/Task' menu item and click on the 'Add New' button. Click on the 'Edit workflows' button.
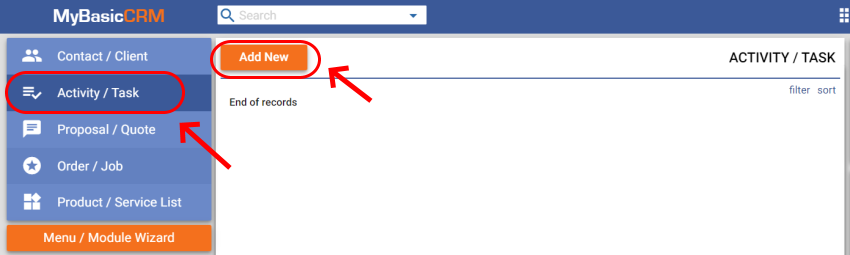
Click on the 'Edit workflows' button, then click on the 'Add new' button to add a new automated task.
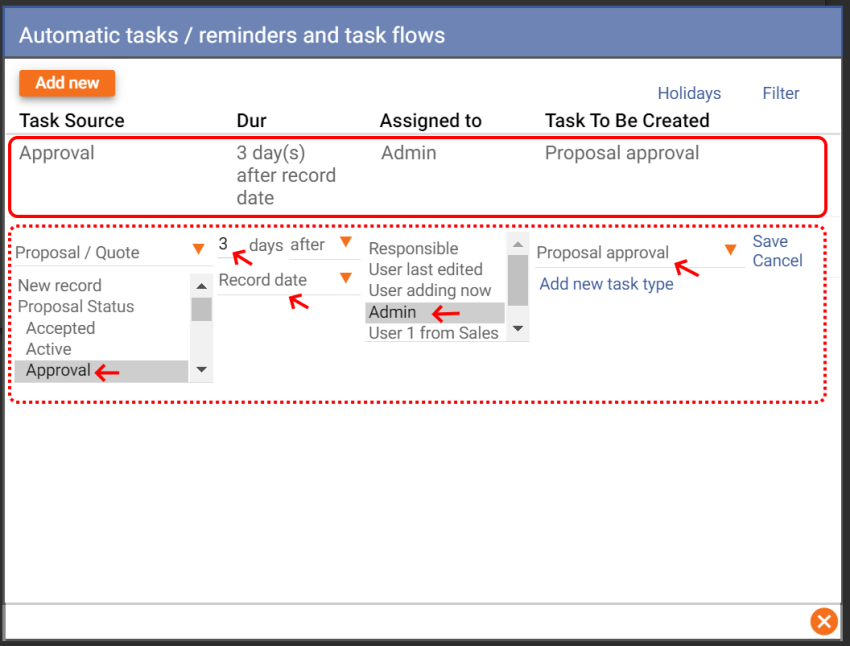
Create the first automated activity:
Task Source: Select 'Proposal/ Quote' and then select 'Approval' as Proposal Status
Duration: Enter '3' days and select 'after' the 'Record date'
Assigned to: Select the user to complete the task; for our case it is 'Admin'
Task to be created: Select (or create) the 'Proposal approval' activity.
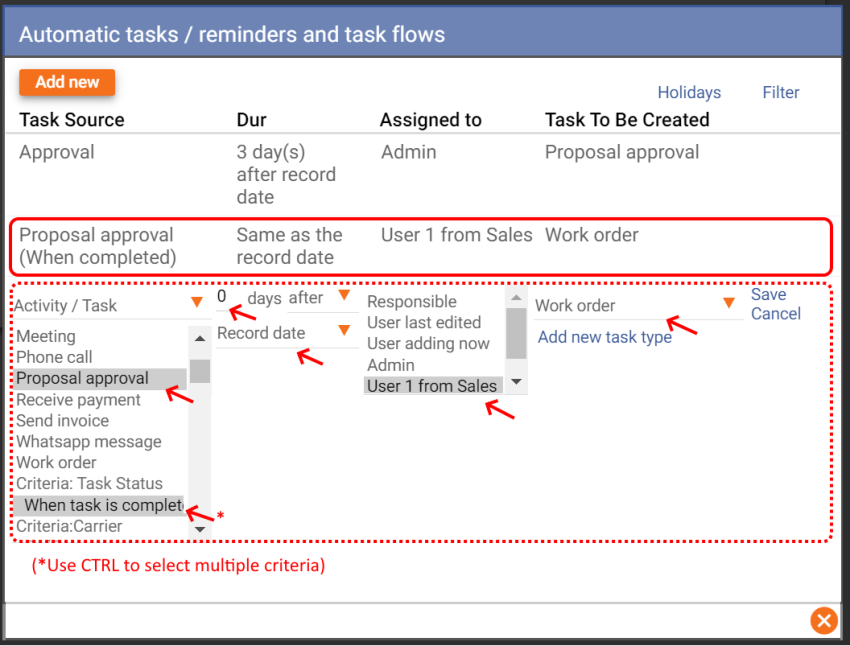
Create the second automated activity:
Task Source: Select 'Activity/Task'. Then select 'Proposal approval' and 'When the task is completed' together by holding the CTRL button of your keyboard.
Duration: Enter '0' days because we want the task to be completed within the same day.
Assigned to: Select the user to complete the task; for our case it is 'User1 from Sales'
Task to be created: Select (or create) the 'Work order' activity.
ENABLING NOTIFICATIONS
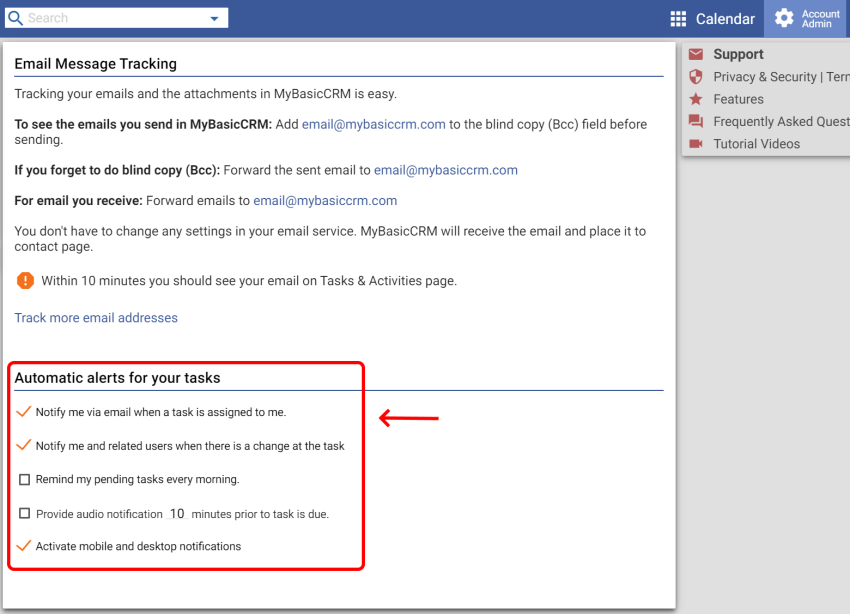
Go to your Account Settings. Click 'Email Tracking Settings / Alerts / Notifications'.
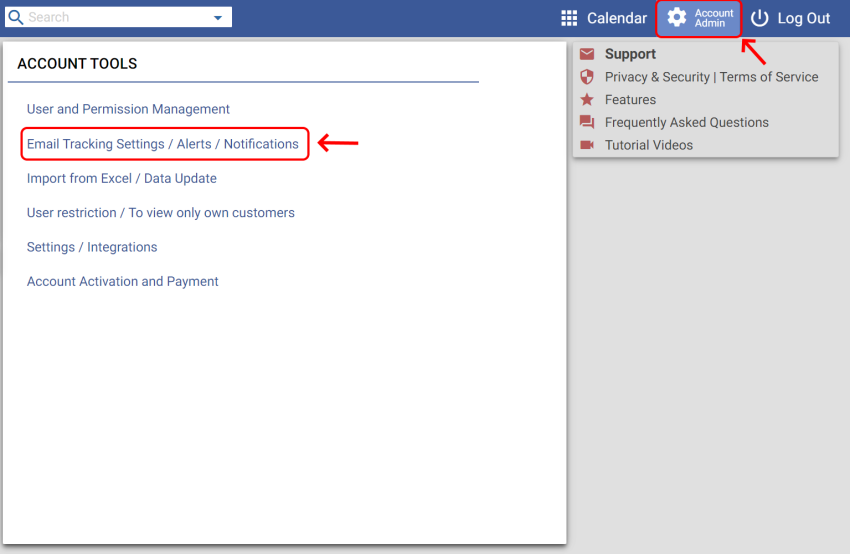
Enable notifications that are suitable for you. Each user may also need to edit notifications in their own account.
TESTING THE WORKFLOW
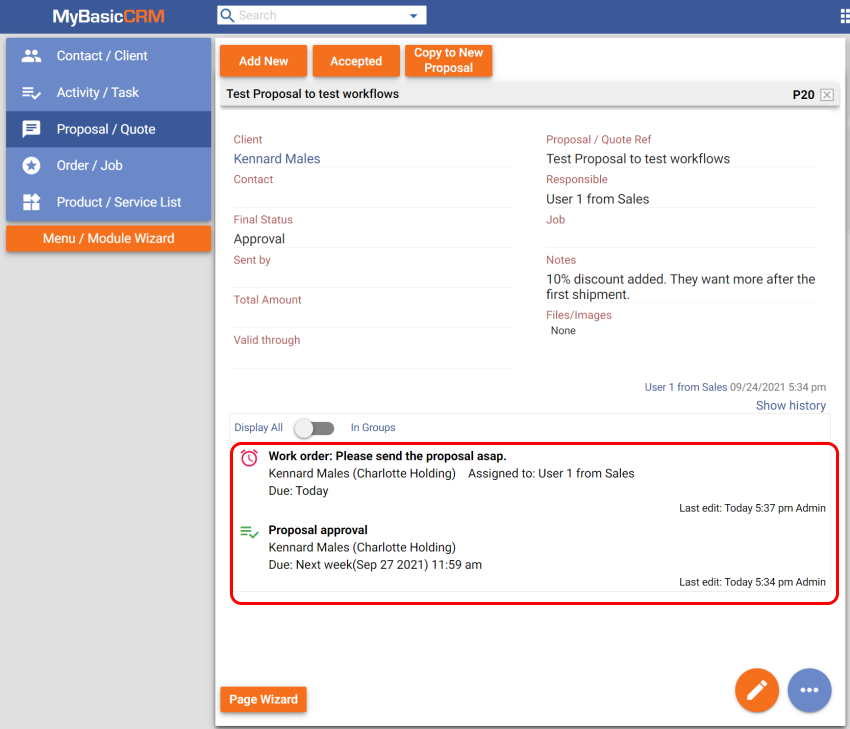
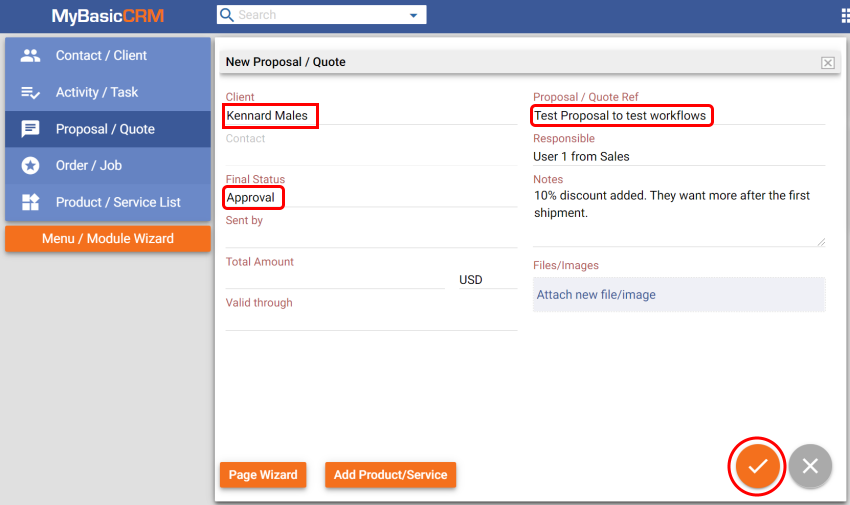
Let's suppose that User1 from the sales department creates a new proposal for a client, names it and sets the Final Status as 'Approval' which was our trigger for the first workflow.
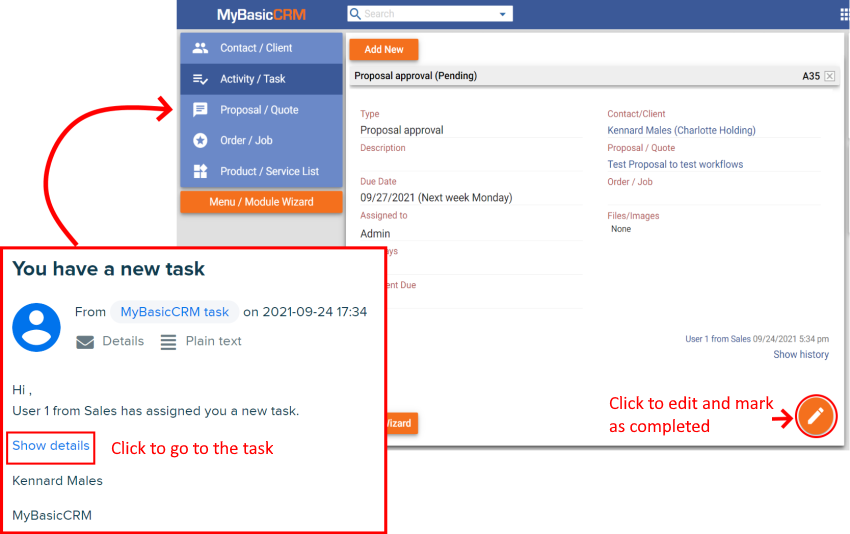
The automated workflow creates a new task assigned to 'Admin', and Admin receives a notification. The new task will also be available on the dashboard and calendar.
Admin marks the task as completed as a trigger for our second workflow. A successor task will be created and assigned to User1.
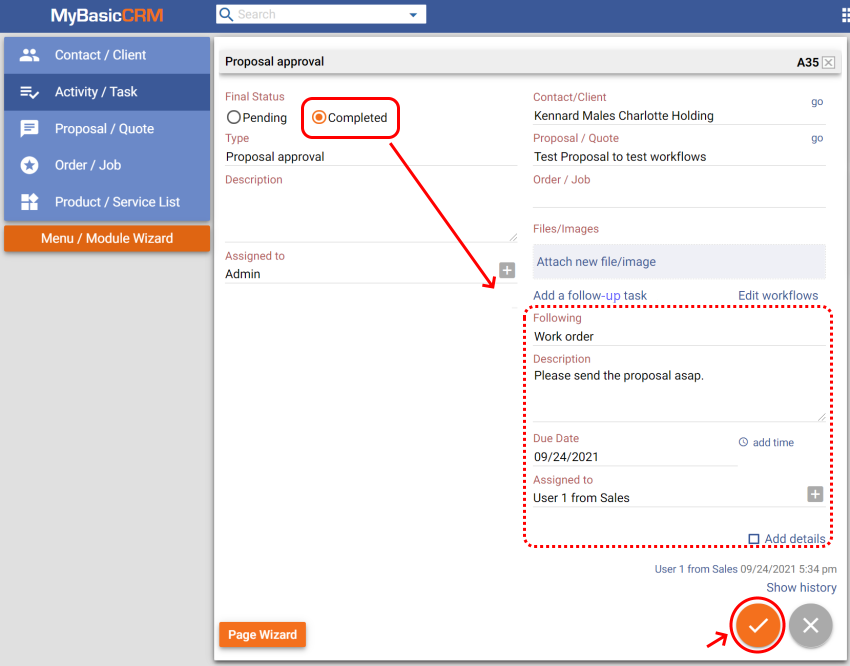
User1 receives a notification. The new task will also be available on the dashboard and calendar.
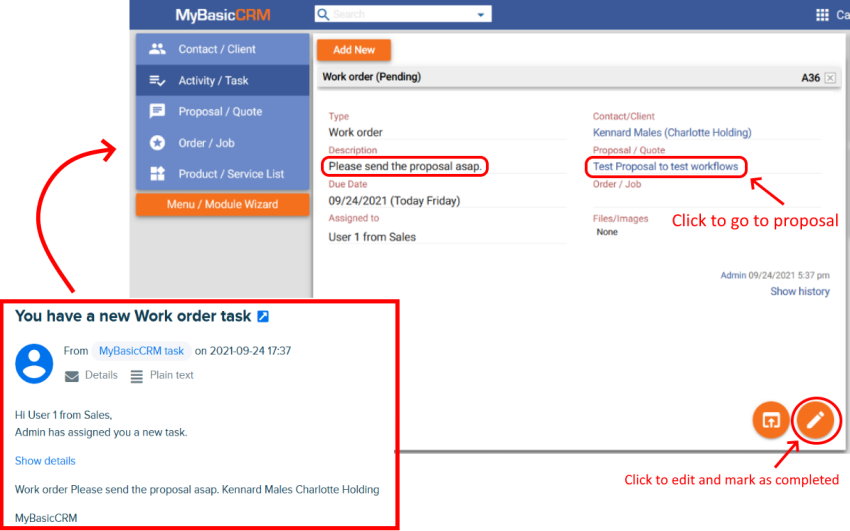
Since everything is linked to each other, it is possible to follow the task history from the relevant proposal, client or activities page.